Deploy Google App Engine Using Gitlab CI

All we have to do is:
- Create a service account (I assume you know about it)
- Setup Gitlab CI
- Magic happens!
Creating a service account
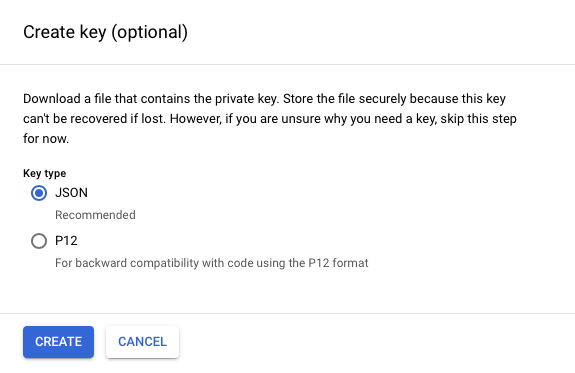
Visit iam-admin page and create the service account with required permissions and create the key.
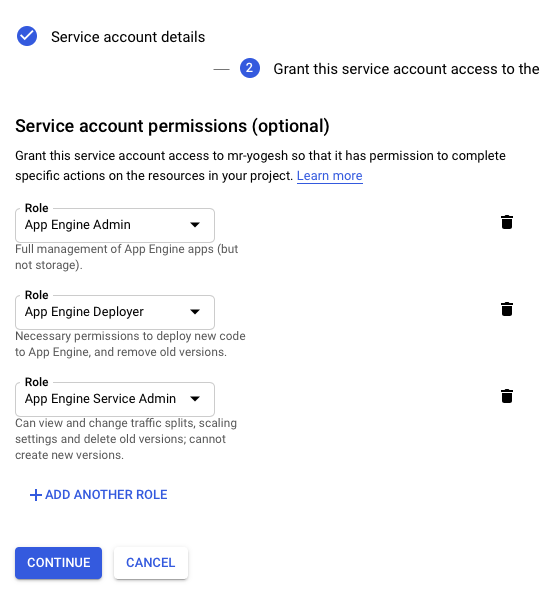
- App Engine Admin (This is required only if your using dispatch.yaml)
- App Engine Deployer and App Engine Service Account (Ignore this both,if you have given 1st permission)
- Grant
Service Account Userpermission to CI/CD service account - Create the JSON key (You will need this in Gitlab configuration)
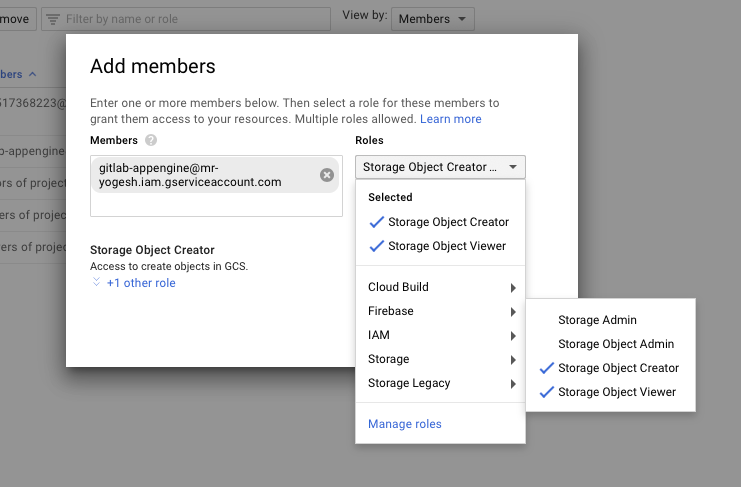
Now visit storage and go to buckets:
- staging.PROJECT-ID.appspot.com
- us.artifacts.PROJECT-ID.appspot.com (Create bucket with this name, if you don’t have one)
Now add your service account as a member of this buckets and give permissions Storage Object Creator and Storage Object Viewer.
One final step in Google Cloud Developer console.
Enable cloud-build api and you will need to have billing account linked to enable this api.
Setup Gitlab CI
We will deploy master branch to production and staging branch to staging.
Visit CI/CD settings of your gitlab project.
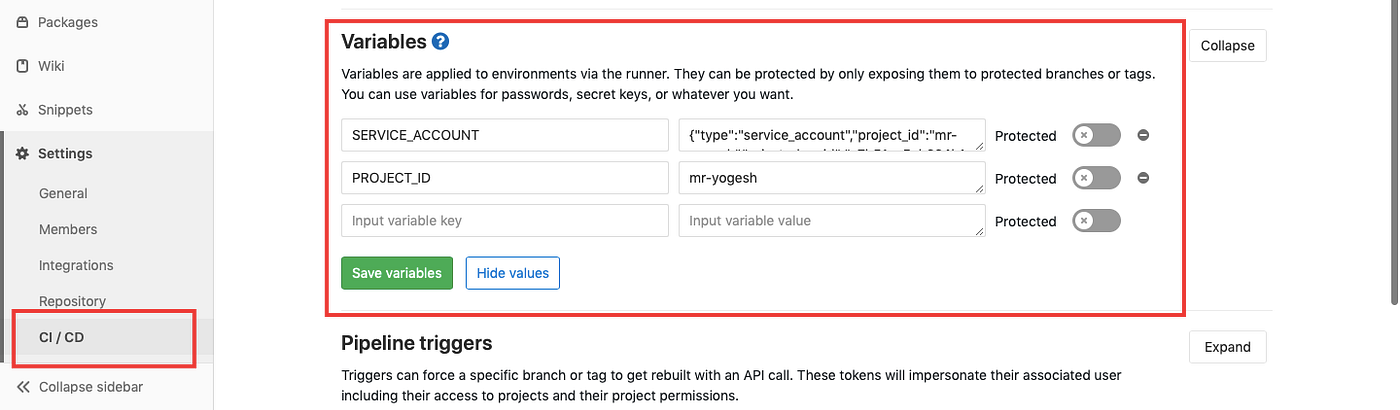
Let’s add two variable PROJECT_ID and SERVICE_ACCOUNT
SERVICE_ACCOUNT: Put the data of JSON key which we have downloaded while creating service account.
Now create the .gitlab-ci.yml file in your root folder.
stages:
   - build
   - deploy

build_project:
   stage: build
   image: node:16
   script:
      - echo "Start building App"
      - yarn install
      - yarn build
      - echo "Build successfully!"
   artifacts:
      expire_in: 1 hour
      paths:
       - build
       - node_modules

deploy_production:
   stage: deploy
   image: google/cloud-sdk:alpine
   environment: Production
   only:
      - master
   script:
      - echo $SERVICE_ACCOUNT > /tmp/$CI_PIPELINE_ID.json
      - gcloud auth activate-service-account --key-file /tmp/$CI_PIPELINE_ID.json
      - gcloud --quiet --project $PROJECT_ID app deploy app.yaml
   after_script:
      - rm /tmp/$CI_PIPELINE_ID.json

deploy_staging:
   stage: deploy
   image: google/cloud-sdk:alpine
   environment: Staging
   only:
      - develop
   script:
      - echo $SERVICE_ACCOUNT > /tmp/$CI_PIPELINE_ID.json
      - gcloud auth activate-service-account --key-file /tmp/$CI_PIPELINE_ID.json
      - gcloud --quiet --project $PROJECT_ID app deploy staging.yaml --verbosity=info
   after_script:
      - rm /tmp/$CI_PIPELINE_ID.json
this is an exaple of app.yaml
runtime: nodejs16
env: standard
service: dashboard-production
instance_class: F1
handlers:
  - url: /(.*\..+)$
    static_files: build/\1
    require_matching_file: false
    upload: build/(.*\..+)$
  - url: /.*
    static_files: build/index.html
    require_matching_file: false
    upload: build/index.html
  - url: .*
    script: auto
automatic_scaling:
  min_idle_instances: automatic
  max_idle_instances: automatic
  min_pending_latency: automatic
  max_pending_latency: automatic
network: {}
and this is an example of staging.yaml
runtime: nodejs16
env: standard
service: default
instance_class: F1
handlers:
  - url: /(.*\..+)$
    static_files: build/\1
    require_matching_file: false
    upload: build/(.*\..+)$
  - url: /.*
    static_files: build/index.html
    require_matching_file: false
    upload: build/index.html
  - url: .*
    script: auto
automatic_scaling:
  min_idle_instances: automatic
  max_idle_instances: automatic
  min_pending_latency: automatic
  max_pending_latency: automatic
network: {}
Changes of master and staging branches will deploy to production and staging respectively. I have used dispatch.yaml file, if you don’t have one just remove it from the script as well.
Push the .gitlab-ci.yml in your repo and your are done.
Source code: https://github.com/mryogesh/yogesh In case if you want to see staging-app.yaml and dispatch.yaml file.
Magic 🎩 Now, git push automatically deploys your code to staging and production.